

When we really started to use and take a close look at our cabinets we realized that they were really poorly repainted at some point. The people who painted them had used some sort of spray paint and didn’t take the time to do it correctly. You could tell from the drips on the face and sides of the cabinets and because of the fact that the hinges were completely painted over [you’re not supposed to do that!]
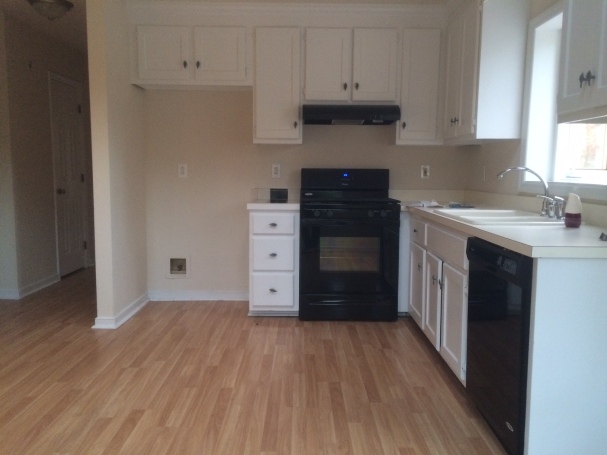
We knew that we wanted to replace the quirky (also sort-of tacky) little leaf knobs that were on the cabinets with actual cabinet pulls anyway, so we made the decision to take them all down, sand off the drip marks, repaint and put back up with new hardware.
Sounds easy enough, right? Think again. This proved to be one of the longest projects for us to complete. Mostly because there are so many steps and you have to wait in-between most of them.
Step 1: Taking the cabinets down
First thing we had to do was get the cabinet doors off of the cabinets themselves. Because someone had painted over the hinges this was much harder than it should have been. We literally had to chisel the paint out of the screws and once we got the screws off we had to pry the hinges from the cabinets with knives. It was ridiculous. This is why you shouldn’t take shortcuts and do it the easy way!
Step 2: Cleaning them up
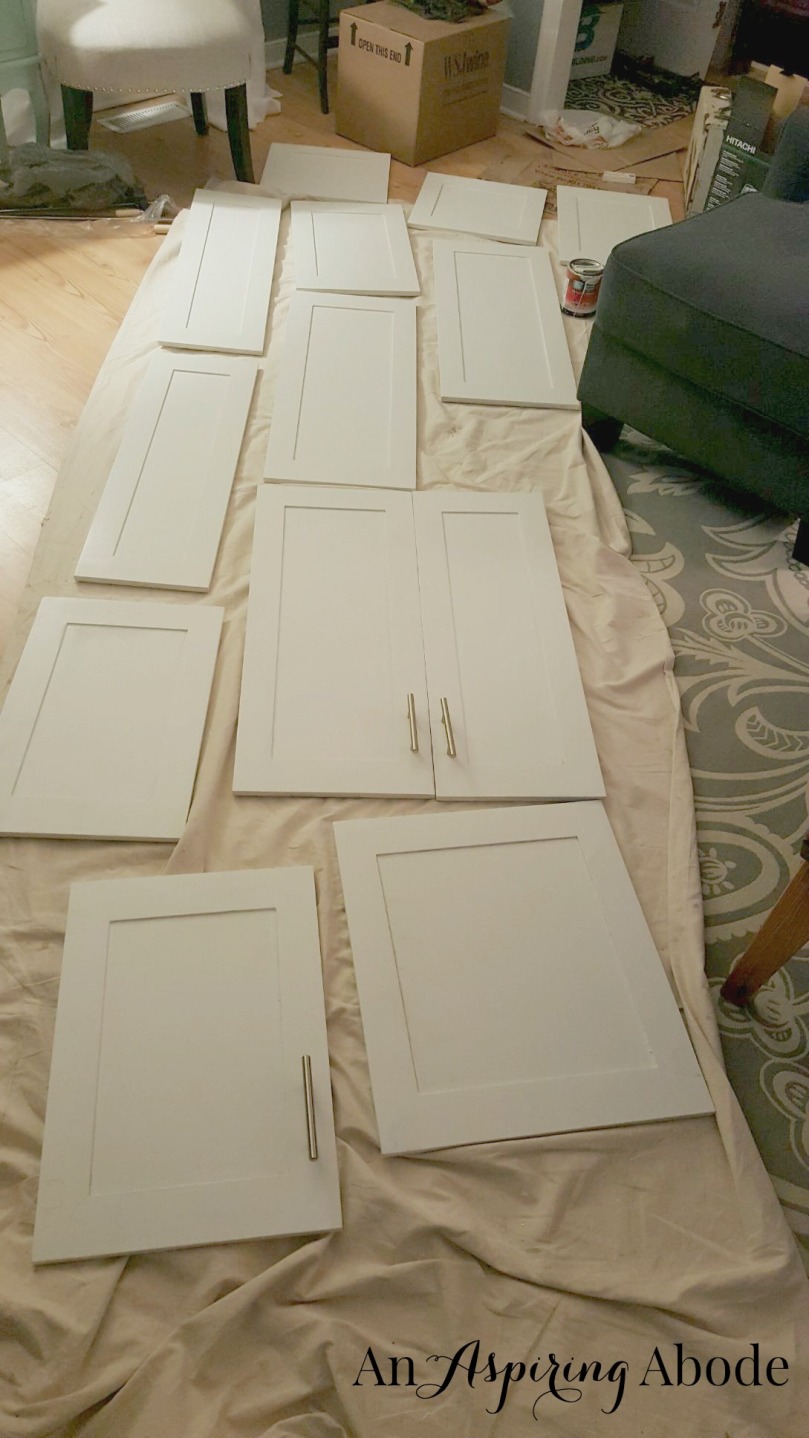
Then we had to chisel the hinges from the cabinet faces. This also took a bunch of time because we have 13 cabinet doors. 13 cabinets X 2 hinges each = 26 hinges to chisel. No bueno.
Then, because we were changing from knobs to pulls we had to fill the existing holes with wood filler. Then wait for that to dry.
Step 3: Sanding
Let me start by saying this – sand outside if you can. Dust will literally get in every spot that air touches if you don’t. For us it was really cold outside and we got impatient so we went ahead sanding in the sunroom thinking that it would just get dusty in there…HAHA. Dust. Got. Everywhere.
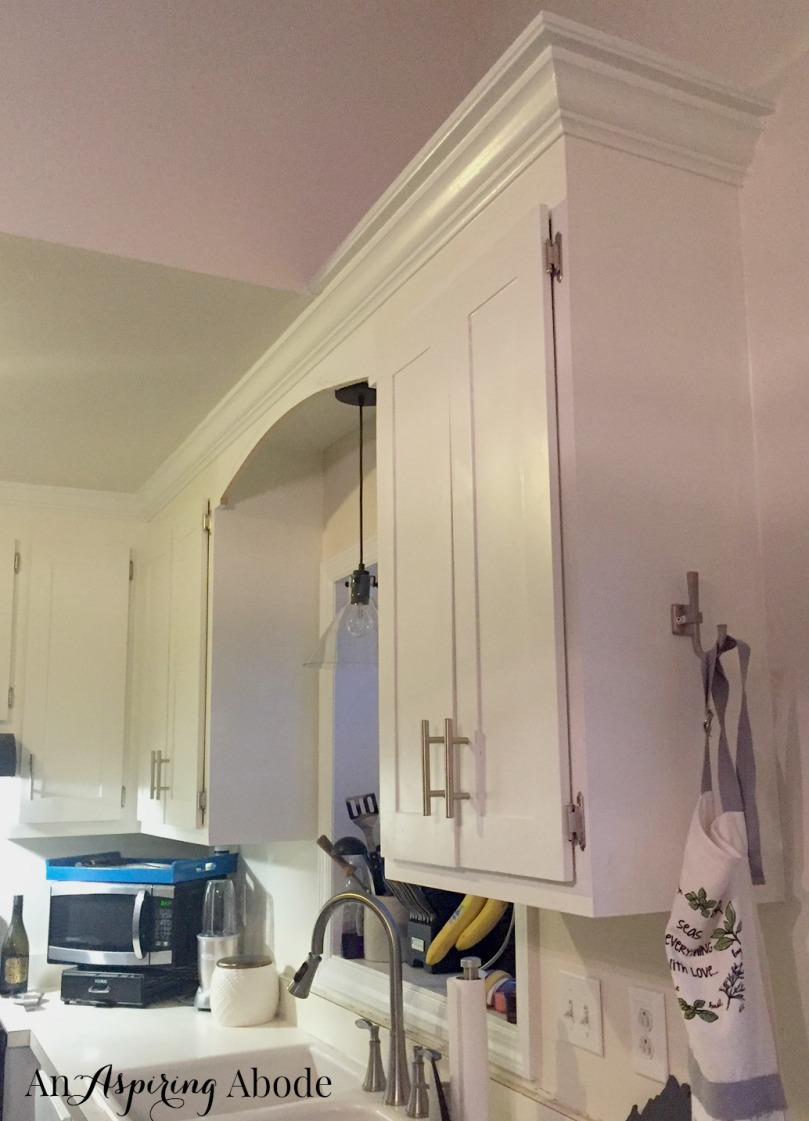
The next day we sanded the spots where we put the wood filler down by hand. I started to really look at the cabinets from the back and that’s when I had the greatest idea ever (if I do say so myself). I  noticed that the inside of the cabinet doors were way prettier and more modern than the actual face of the cabinets. They looked just like modern shaker cabinets while the intentional side looked like cabinets from 1989 (because they were).
Because the hinges were not inset on that side we were able to make the decision to flip the cabinets inside out! I think this made the biggest difference….and it was completely free!
THEN knowing that we were going to flip them, we had to sand and fill all of the spots where the existing hinges attached to the inside of the cabinets. (See left)
Step 4: Painting
After that we also decided we wanted to change the paint color.We wanted it to look a little bit less like primer (bright white) and more like a creamy white color that would go well with the brown butcher block of the island. I chose Alabaster White by Sherwin Williams. It was not yellow, not gray, just a creamy milky white. This also meant that we now had to paint the cabinet bases so that they would match. So I painted all of the bases from top to bottom.
Then came the time to paint the actual doors. Let me just say that painting a cabinet door really stinks. You have to paint the whole bottom and little skinny sides and then wait for it to dry, flip it over and paint the other side. Then you have to do it again with the second coat. All 13 freakin’ doors. It was cold outside, so for the 2 days that it took me to do this our living room was filled with a huge drop cloth and cabinet doors. We had to constantly watch Wyatt to make sure paw print accents didn’t find their way onto them. 🙂
Step 5: Install Hardware
LASTLY we put the hardware on. Goodman didn’t trust me to do this because the drilling had to be really precise so that the pulls would fit correctly and not be crooked or anything like that.
We put the hinges on first in this case because there were already holes in the base and we purchased the same kind of hinges so that we wouldn’t have to sand and fill and paint and all that on the base of the cabinets.
After putting the doors on the hinges we needed to put the actual pulls on. So, we measured how far from the bottom of the cabinet we wanted the pull to be and then added the distance from the end of the pull to where the screw goes in the pull at the bottom and marked that on every cabinet. After the hardware, we were done!
I’m going to take some better pictures and update the post but here are some pictures of the upper cabinets from my iPhone!


The last thing we did was cut the old wavy wood piece that was above the sink. Goodman thought it’d look good with a curve to match the curves on our appliances. I think it looks great!

Overall I think the whole long process really was worth all of the steps and the time! What do you think?
P.S. We are ALMOST done with the kitchen! We need to get new countertops, a backsplash, move the microwave into the island (when we finish the electric in the island) and we will be pretty much done! I’ll be doing a post about the island soon and then eventually one for the whole kitchen itself. Stay tuned 🙂
Total Cost
$174 plus the tools we had on hand. See details below:
Quart of Sherwin Williams Ovation Semi-Gloss Paint in Alabaster White: $24, 10-Pack 3-inch Center-to-Center Satin Nickel Bar Cabinet Pulls: $110, Mini Foam Cabinet Roller: $5, 20 Double Pack Hinges found on Amazon: $35. On hand Materials: Wood Filler, Sander and Sandpaper, Drop Cloth, Angled Paint Brush.

Very nice!
LikeLike
Excellent!
LikeLike
[…] Materials for Island: Around $200, Pre-fab cabinet with drawer: $107 on sale, Butcher Block 6ft x 3ft Island Top: $390, Sherwin Williams Quart of Semi-Gloss Paint in Dorian Grey: $24, Waterlox Products: All three for $77, Target Bar Stools: $67 each, Michael’s Baskets were $12 each, Microwave: $170 from Wayfair, Orchid from Kroger: $15, Light and Materials: about $75, Pulls were left over from contractors pack we bought for the cabinets. […]
LikeLike