
This was one of those things that was like Welllll we don’t really NEED to do anything to it but it could definitely look better.
Having moved in during the cold season, we didn’t notice that all of the exterior doors were painted in oil based paint by the seller to just really quickly make them look better in order to sell. This didn’t really become apparent until is started getting warm outside and paint would melt and make the door stick. So we knew that it was neccessary to peel and sand the paint off before this became more of an issue. This is why the only before pictures I have is this one, with most of the paint already peeled off, ready for sanding

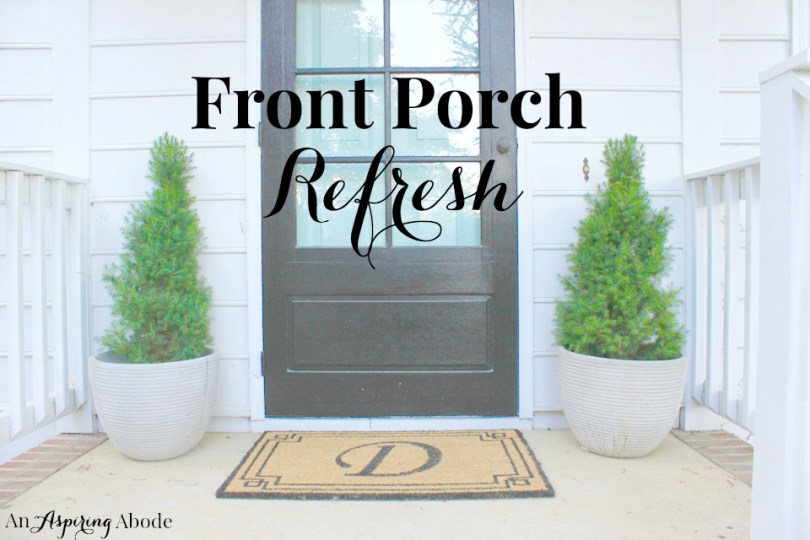
The front porch isn’t too big but it’s the right size to be able to fit a few people on and welcome guests to our house before they come in. I wanted it to be inviting and minimally decorated but still give you the idea that you are about to enter a thoughtful home.
 I love it! So what did we do? I decided on these essentials to spruce it up:
- Paint the door
- Get matching topiaries for the sides of the door
- A unique welcome sign
- New exterior lights
- New doormat
We had been given the “D” mat as a gift from my dad, and in that “before” picture we had already replaced the lights with a pair from Wayfair that I loved because they matched the new flush light that I put into the entryway just as you come through the front door. (I’ll share a picture of that later).
But when it came to the actual door there was a lot of work to do. First we needed to finish sanding the door, and get to painting. I started scraping/sanding and all of these huge paint chunks started coming off and revealing layers and layers of colors. There was black, green, hunter green, purple, red, and white under there. Unfortunately, because some chunks had already been taken off (whoops) we had to take all of them off.
So our quick easy paint job turned into an all weekend thing consisting of an entire quart of paint stripper and lots and lots of scraping. At one point I was like “I’M DONE, let’s just get a new door.” But we had already done so much work that Goodman assured me that we were making the right decision by doing it ourselves and saving the money. An entire Trader Joe’s bag of paint scrapes later, we finally finished.
Then had to put a coat of primer on before we actually painted.
After painting we updated the doorknob and added this welcome sign that I found at Class and Trash.
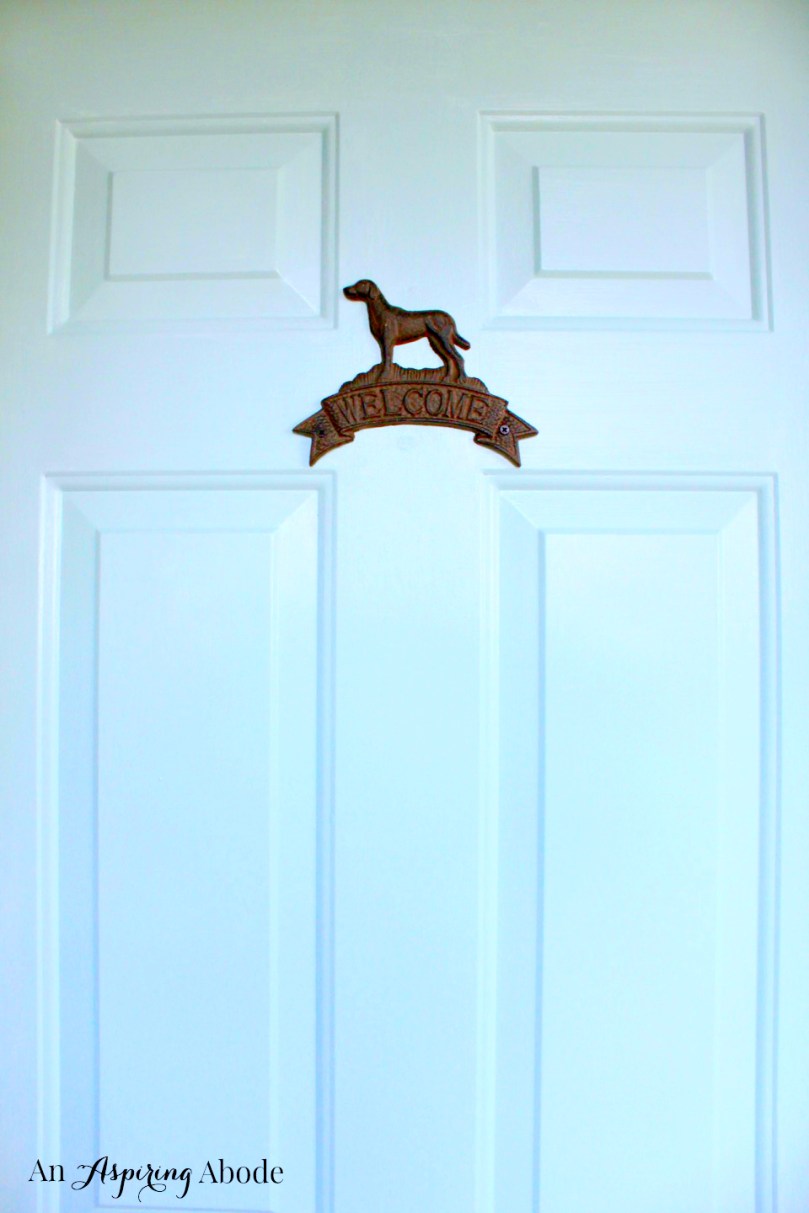
The OCD in me loved that the door handle base that is actually up against the door and the base of the light that is on the wall are the same shape. It makes it look like a set I think. 🙂

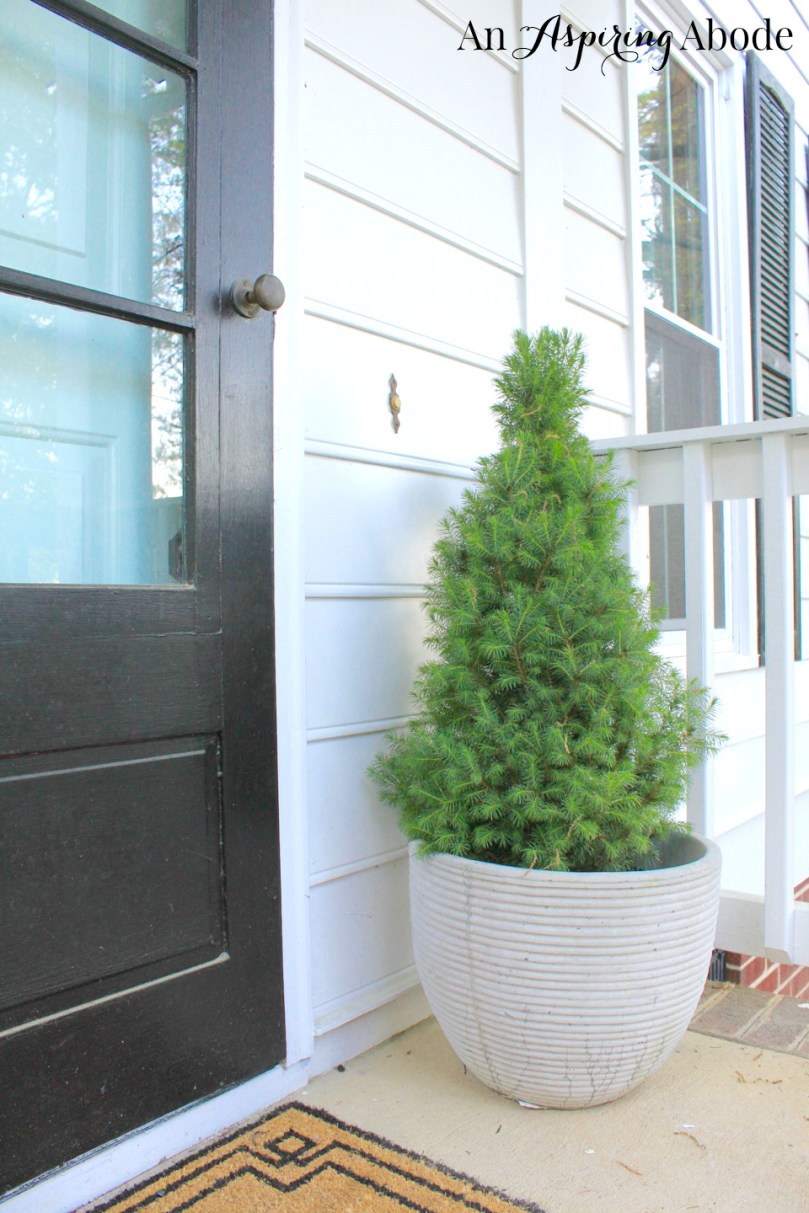
Then I went on over to good ole’ Lowes and purchased a couple of cute topiaries and then to Home Goods to get these (extremely heavy) concrete planters. The trees are a little small right now but they will grow to about 4 feet if we don’t accidentally kill them and then we can trim them into shapes – which Goodman is really excited about.
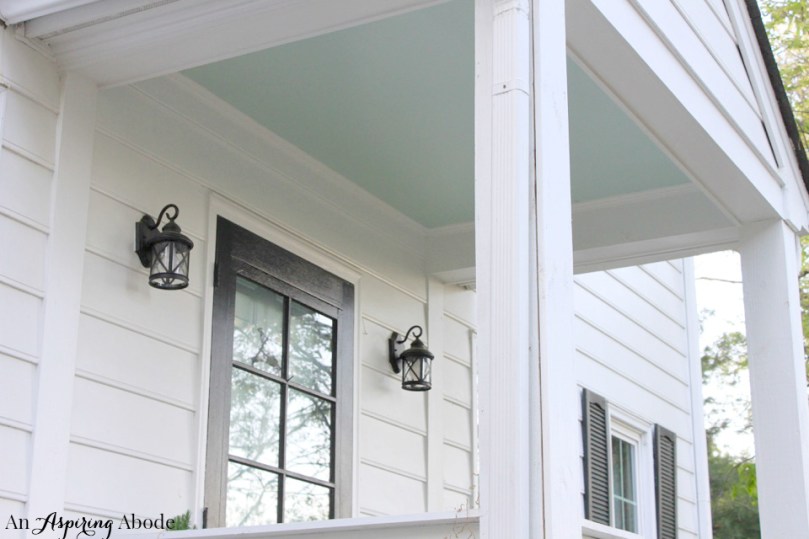
As a final touch we decided to go with southern tradition and paint the ceiling the same teal color as the door, I LOVE IT.
Now I love the way the entry looks! I sometimes even go into the house that way instead of from the side where the driveway is just because I love it so much!


We have been thinking about painting the beams and the railings black to add some more contrast, but I’m really on the fence about it. What do you think? Let me know in the comments!
Total Cost: $225
Wayfair Exterior Lights: 2 @$29.99 each, Doormat: Gift, Thrift Store Welcome Sign: $6, Waterscape Sherwin Williams Paint: $16, Lowe’s Topiaries: 2 @ $30 each, Home Goods Concrete Planters: 2 @ $13 each, Paint Stripper: $7. Doorknob from Amazon: $50. On hand: Paint Brushes, Drill, Paint Scrapers.
